Wednesday, October 9, 2013

Simple Spring and JPA with Hibernate tutorial. Part 3: Simple Security

Spring security In this blog post we continue adding functionality to our Spring and JPA application. We will be adding basic security using Spring Security (formerly known as Acegi Security). However to achieve this we'll also look at some new elements:
  • Spring's ContextLoaderListener and hierarchical contexts
  • Entity relationships in JPA
  • Multiple Spring xml files and their organization
  • Maven's quirks with transitive dependencies
This example builds on top of the code that was written for part 2, but we will rearrange several pieces. Let's start by looking at the pom.xml where we've added two new dependecies:
pom.xml
<project xmlns="http://maven.apache.org/POM/4.0.0" xmlns:xsi="http://www.w3.org/2001/XMLSchema-instance"
         xsi:schemaLocation="http://maven.apache.org/POM/4.0.0 http://maven.apache.org/maven-v4_0_0.xsd">
    <modelVersion>4.0.0</modelVersion>
    <groupId>test.tutorials</groupId>
    <artifactId>spring-hib-jpa</artifactId>
    <packaging>war</packaging>
    <version>1.0-SNAPSHOT</version>
    <name>spring-hib-jpa Maven Webapp</name>


    <properties>
        <springVersion>3.2.4.RELEASE</springVersion>
        <springSecurityVersion>3.1.4.RELEASE</springSecurityVersion> <!-- 1 -->
    </properties>

    <dependencies>


        <dependency>
            <groupId>org.springframework</groupId>
            <artifactId>spring-beans</artifactId>
            <version>${springVersion}</version>
        </dependency>

        <dependency>
            <groupId>org.springframework</groupId>
            <artifactId>spring-webmvc</artifactId>
            <version>${springVersion}</version>
        </dependency>

        <dependency>
            <groupId>org.springframework</groupId>
            <artifactId>spring-orm</artifactId>
            <version>${springVersion}</version>
        </dependency>

        <dependency> <!-- 2 -->
             <groupId>org.springframework.security</groupId>
             <artifactId>spring-security-core</artifactId>
             <version>${springSecurityVersion}</version>
        </dependency>

        <dependency>
             <groupId>org.springframework.security</groupId>
             <artifactId>spring-security-config</artifactId>
             <version>${springSecurityVersion}</version>
        </dependency>

        <dependency>
            <groupId>org.springframework.security</groupId>
            <artifactId>spring-security-web</artifactId>
            <version>${springSecurityVersion}</version>
        </dependency>


        <dependency> <!-- 3 -->
            <groupId>org.springframework</groupId>
            <artifactId>spring-aop</artifactId>
            <version>${springVersion}</version>
        </dependency>


        <dependency>
            <groupId>org.hibernate</groupId>
            <artifactId>hibernate-entitymanager</artifactId>
            <version>4.1.9.Final</version>
        </dependency>

        <dependency>
            <groupId>jstl</groupId>
            <artifactId>jstl</artifactId>
            <version>1.2</version>
        </dependency>

        <dependency>
            <groupId>com.h2database</groupId>
            <artifactId>h2</artifactId>
            <version>1.3.161</version>
        </dependency>


        <dependency>
            <groupId>org.apache.tomcat</groupId>
            <artifactId>tomcat-dbcp</artifactId>
            <version>7.0.41</version>
        </dependency>

    </dependencies>
</project>
  1. We add a property for the Spring Security version, just like we did for Spring. In version 3, Spring and Spring Security have different release schedules and versions. Both projects should have their versions synchronized by version 4.
  2. We add 3 Spring Security dependencies:
  3. "spring-security-core" provides the basic classes used by the framework
  4. "spring-security-config" provides the elements needed to configure the framework, for example the xsd files used in the xml configuration.
  5. "spring-security-web" provides the hooks to provide URL based security.
  6. Spring security requires the "spring-aop" dependency. However, since the Spring and Spring Security versions are not in sync, it depends on a version of "spring-aop" that is incompatible with Spring 3.2.4 (the one we're using). To solve this, we add an explicit dependency to the right version. When a project depends on two different versions of the same library, Maven will pick the one closer to the root. What we have done is declared the dependency at the very root of the project, to ensure our version is used. Luckily our version of "spring-aop" is compatible with the Spring Security version we're using.
Now let's look the at the web.xml, where we have a few new elements:
src/main/webapp/WEB-INF/web.xml
<web-app xmlns="http://java.sun.com/xml/ns/javaee" version="2.5">

    <listener>
         <listener-class>org.springframework.web.context.ContextLoaderListener</listener-class> <!-- 1 -->
     </listener>

    <context-param>
        <param-name>contextConfigLocation</param-name>  <!-- 2 -->
        <param-value>WEB-INF/spring-context.xml</param-value>
    </context-param> 

    <filter>
        <filter-name>springSecurityFilterChain</filter-name>
        <filter-class>org.springframework.web.filter.DelegatingFilterProxy</filter-class>   <!-- 3 -->
    </filter>

    <filter-mapping>
        <filter-name>springSecurityFilterChain</filter-name>   <!-- 4 -->
        <url-pattern>/*</url-pattern>
    </filter-mapping>

    <servlet>
      <servlet-name>spring</servlet-name>
      <servlet-class>org.springframework.web.servlet.DispatcherServlet</servlet-class>
      <load-on-startup>1</load-on-startup>
    </servlet>
   
    <servlet-mapping>
        <servlet-name>spring</servlet-name>
        <url-pattern>*.html</url-pattern>
    </servlet-mapping>

</web-app>
  1. In this new application we introduce another way of configuring the Spring container, through a listener. The listener will create a parent context. We will also create a child context, instantiated by the DispatcherServlet. The child context will have access to the beans of the parent context, but not the other way around.
  2. The location of the xml file to instantiate the parent context is defined with a context parameter named "contextConfigLocation". We will look at this file in detail. In this parameter you can configure more than one file, but for now
  3. To actually secure the application, we add a new filter. In the spring world, the MVC framework and the security framework are separate mechanisms.
  4. The security filter is normally applied to the whole application, with a mapping of "/*". We can later tune this apply rules to only some URLs.
Let's start looking at the spring-context.xml, where we configure the parent spring context:
src/main/webapp/WEB-INF/spring-context.xml
<?xml version="1.0" encoding="UTF-8"?>
<beans xmlns="http://www.springframework.org/schema/beans"
       xmlns:xsi="http://www.w3.org/2001/XMLSchema-instance"
       xmlns:tx="http://www.springframework.org/schema/tx"
       xmlns:context="http://www.springframework.org/schema/context"
       xmlns:beans="http://www.springframework.org/schema/beans"
       xsi:schemaLocation="http://www.springframework.org/schema/beans
        http://www.springframework.org/schema/beans/spring-beans.xsd
        http://www.springframework.org/schema/context
        http://www.springframework.org/schema/context/spring-context.xsd
        http://www.springframework.org/schema/tx
        http://www.springframework.org/schema/tx/spring-tx.xsd
        ">

    <beans:import resource="spring-security.xml"/> <!-- 1 -->

    <context:component-scan base-package="test">
            <context:exclude-filter expression="org.springframework.stereotype.Controller" type="annotation"/>  <!-- 2 -->
    </context:component-scan>
   
    <tx:annotation-driven/> <!-- 3 -->

    <bean id="dataSource" class="org.apache.tomcat.dbcp.dbcp.BasicDataSource">
        <property name="driverClassName" value="org.h2.Driver"/>
        <property name="url" value="jdbc:h2:mem:test"/>
    </bean>


    <bean id="entityManagerFactory"
          class="org.springframework.orm.jpa.LocalContainerEntityManagerFactoryBean">
        <property name="dataSource" ref="dataSource"/>
        <property name="packagesToScan" value="test.model"/>
        <property name="jpaVendorAdapter">
            <bean class="org.springframework.orm.jpa.vendor.HibernateJpaVendorAdapter">
            </bean>
        </property>
        <property name="jpaProperties">
            <props>
                <prop key="hibernate.show_sql">true</prop>
                <prop key="hibernate.dialect">org.hibernate.dialect.H2Dialect</prop>
                <prop key="hibernate.hbm2ddl.auto">create-drop</prop>
            </props>
        </property>
    </bean>

    <bean id="transactionManager" class="org.springframework.orm.jpa.JpaTransactionManager"/>

</beans>
  1. In Spring, it is good practice to separate configuration files based on their purpose. Back in the day before annotations, these files could grow enormously. Nowadays they're shorter, but it still helps to keep them separate. The import element will include the contexts of another file, and the corresponding beans will be created in the current context. We will examine the spring-security.xml file later on.
  2. We have copied the component-scan element into this new file. However we're excluding beans that have @Controller annotation. Those beans will be registered by the Spring MVC configuration file.
  3. We have moved all of the JPA configuration (from "tx:annotation-driven" to the end of the file) into the main Spring xml file. I could also be possible to create a new file to keep all database/JPA related bean configuration.

src/main/webapp/WEB-INF/spring-security.xml
<beans:beans xmlns="http://www.springframework.org/schema/security"
    xmlns:beans="http://www.springframework.org/schema/beans"
    xmlns:xsi="http://www.w3.org/2001/XMLSchema-instance"
    xsi:schemaLocation="http://www.springframework.org/schema/beans
        http://www.springframework.org/schema/beans/spring-beans.xsd
        http://www.springframework.org/schema/security
        http://www.springframework.org/schema/security/spring-security-3.1.xsd">

    <http use-expressions="true"> <!-- 1 -->
        <intercept-url pattern="/**" access="isAuthenticated()" />  <!-- 2 -->
        <form-login /> <!-- 3 -->
    </http>

    <authentication-manager> <!-- 4 -->
        <authentication-provider user-service-ref="userService" /> 
    </authentication-manager>
</beans:beans>
  1. The http element provides securing of URLs (Spring Security also allows securing Java methods, but we'll look at that in another post). Of notice here is the attribute use-expressions="true", which allows using Spring EL instead of simply listing allowed roles.
  2. We are securing a single URL, which covers the whole application, and allows access to any use that is successfully authenticated. Multiple urls can be added to fine tune access control, and will be evaluated in the order in which they are declared.
  3. The form-login element provides a basic form based authentication. You can later customized the login page to fit the style of your application. Spring Security provides other ways of authentication, including HTTP BasicAuthentication, and several Single Sign On schemes.
  4. The "authentication-manager" is the bean that will verify the user credentials as well as provide the authorities or roles a user has. We will look at our implementation of the user service later.
Finally, we look at (the now much shorter) spring-servlet.xml. We've removed all of the elements not related to Spring MVC.
src/main/webapp/WEB-INF/spring-context.xml
<?xml version="1.0" encoding="UTF-8"?>
<beans xmlns="http://www.springframework.org/schema/beans"
       xmlns:xsi="http://www.w3.org/2001/XMLSchema-instance"
       xmlns:context="http://www.springframework.org/schema/context"
       xmlns:mvc="http://www.springframework.org/schema/mvc"
       xsi:schemaLocation="http://www.springframework.org/schema/beans
        http://www.springframework.org/schema/beans/spring-beans.xsd
        http://www.springframework.org/schema/context
        http://www.springframework.org/schema/context/spring-context.xsd
        http://www.springframework.org/schema/mvc
        http://www.springframework.org/schema/mvc/spring-mvc.xsd
        ">

    <context:component-scan base-package="test">
        <context:include-filter expression="org.springframework.stereotype.Controller" type="annotation"/> <!-- 1 -->
    </context:component-scan>
    <mvc:annotation-driven/>


    <bean id="viewResolver" class="org.springframework.web.servlet.view.InternalResourceViewResolver">
        <property name="prefix" value="/WEB-INF/jsp/"/>
        <property name="suffix" value=".jsp"/>
    </bean>


</beans> 
  1. Of note in this file is the "context:include-filter" which will only load controllers. Remember that this file is loaded as a subcontext, contrary to the spring-security.xml which is loaded in the main or parent context.
We have also two new entities, Role and Employee. We'll look a employee first
src/main/java/test/model/Role.java
@Entity
public class Role {

    @Id
    private Long id;
    private String name;

    // Getters and setters removed for brevity
}

This is a very basic entity, almost the same as the Person entity we had created in the first part. The most significant difference is that we're missing the @GeneratedValue annotation in the id field. This means that if we want to insert new roles, we need to manually specify an id.

Next we'll look at the Employee entity:


src/main/java/test/model/Employee.java
@Entity
public class Employee {

  @Id
  @GeneratedValue
  private Long id;
  private String userName;
  private String password;
  @ManyToMany
  
  private List<Role> roles;
  // Getters and setters removed for brevity
}

This is also a very basic entity, except for the addition of a collection field. The "roles" field will contain a list of roles assigned to the employee. This is indicated with the @ManyToMany annotation. In order to map the many-to-many relationship (many employees map to many roles), we need a join table. In this case the default join table will be called "Employee_Role", and it will have two columns "Employee_id" and "roles_id". The default can be changed by adding the @JoinTable annotation, which allows us to define the table name, as well as the column names.

After seeing the new entities, we can get a better idea of how they will look by looking at the data we're inserting into the database:


src/main/resources/import.sql
INSERT INTO PERSON (firstName,lastName) VALUES ('Joe','Doe') ;
INSERT INTO ROLE (id,name) VALUES (1,'ROLE_USER');
INSERT INTO ROLE (id,name) VALUES (2,'ROLE_ADMIN');
INSERT INTO EMPLOYEE ( userName, password) VALUES ('user','lion');
INSERT INTO EMPLOYEE ( userName, password) VALUES ('admin','tiger');
INSERT INTO Employee_Role (Employee_id , roles_id) VALUES ((SELECT id FROM EMPLOYEE WHERE userName='user'),1);
INSERT INTO Employee_Role (Employee_id , roles_id) VALUES ((SELECT id FROM EMPLOYEE WHERE userName='admin'),1);
INSERT INTO Employee_Role (Employee_id , roles_id) VALUES ((SELECT id FROM EMPLOYEE WHERE userName='admin'),2);

In this file we're now also inserting two employees, and the corresponding roles for each employee. Since the id of the employee is not know (we could assume they would be 1 and 2, but there's no guarantee), we use a SELECT to find the correct Id.

Now let's look at the employee service and DAO. This is the only part that requires some significant Java code. Everything else has been XML and some annotations in a POJO. This shows how much coding you're saving by using such a framework. Let's look at the EmployeeDAO first:


src/main/java/test/dao/impl/EmployeeDAO.java
@Repository
public class EmployeeDAO implements IEmployeeDAO {

    @PersistenceContext
    private EntityManager em;

    @Override
    public Employee findByUserName(String userName) {
        TypedQuery<Employee> query=em.createQuery("SELECT e FROM Employee e WHERE e.userName=:userName", Employee.class); //1
        query.setParameter("userName",userName); //2
        return query.getSingleResult(); //3
    }
}
  1. This class has only one method. In this method we're using the TypedQuery, which allows our query results to already have the correct type, and save us some potentially dangerous type casting.
  2. In this query we're using a parameter with a named placeholder ":userName". We then pass the user name we're looking for with the method setParameter.
  3. The getSingleResult method will return a single Employee. If no employee is found, a runtime exception of NoResultException type will be thrown.

Finally, we look a the user service:


src/main/java/test/service/impl/UserService.java
@Service
@Transactional
public class UserService implements UserDetailsService {

    @Autowired
    private IEmployeeDAO userDAO;


    public UserDetails loadUserByUsername(String userName) throws UsernameNotFoundException {
        Employee employee =userDAO.findByUserName(userName); // 2
        if (employee ==null) {
            throw new UsernameNotFoundException("Invalid Employee"); // 3
        }


        return createUserDetails(employee); // 4
    }

    private UserDetails createUserDetails(Employee employee) {
        List<GrantedAuthority> authorities=new ArrayList<GrantedAuthority>();
        for (Role role:employee.getRoles()) {
            authorities.add(new SimpleGrantedAuthority(role.getName())); // 5
        }
        User ret=new User(employee.getUserName(),employee.getPassword(),true,true,true,true,authorities); // 6
        return ret;
    }
}
  1. The UserService implements the Spring Security interface UserDetailsService. At this point it does not implement any our interfaces, but eventually will, once we add extra functionality that requires finding users.
  2. The employee is found using our DAO.
  3. If the employee is not found, a Spring Security exception of type UsernameNotFoundException is thrown. In this section we could also catch the RuntimeExceptions coming from the DAO, in order to manipulate the errors displayed by Spring Security. If we don't, Spring Security would display the message of the excpetion, which might not be the most user friendly message (for example "No entity found for query" when user is not found).
  4. The actual return value of the method is loadUserByUsername is a Spring Security interface, UserDetails. We use a private method to create the right type of object from the Employee object.
  5. In our private method, each Role object becomes a SimpleGrantedAuthority, another Spring Security object.
  6. Finally we create a User object, based on the information found in the Employee object and the list of GrantedAuthority.
We can then compile and run our small application with:

mvn tomcat:run

You can try to run the service but will be greeted with a login screen: http://localhost:8080/spring-hib-jpa/view.html :


You can then try to enter a username an password, and unless it matches what we inserted in database, you'll get an error:

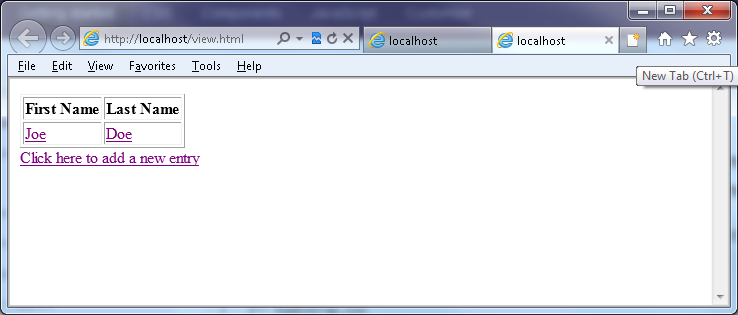
If you enter a valid username and password you will see main screen of our little test application:

This is a very basic example, but we've set up security on our application.  And while there was plenty of XML configuration, there were no code changes.  This separation of business logic and security logic should allow for a better and easier to maintain application.

Source Code

As always the code is available for you to downloand and play with. Clone it from it from github:

git clone https://github.com/aolarte/tutorials.git
The finished code is contained in directory spring3_simple_security.

Simple Spring and JPA with Hibernate tutorial series:

Thursday, October 3, 2013

Simple Spring and JPA with Hibernate tutorial. Part 2: Forms and persisting entities

Continuing from the very basic spring example we did last week, we'll add some more features to demonstrate some more basic JPA and Spring functionality:
  • Spring forms
  • Spring model attributes
  • Persisting and merging entities in JPA
At the end of the post you can see instructions on how to get the source code. Since we're building up from the previous example, we'll only go over the parts that have changed: We start by looking at the Person DAO, in which we added two methods, one to persist person objects, and another to query a person, based on the id. The corresponding interfaces for the DAO and service classes have also been updated with the new methods.
@Repository
public class PersonDAO  implements IPersonDAO {

    @PersistenceContext
    private EntityManager em;

    @Override
    public List<Person> findAll() {
        Query query = em.createQuery("SELECT e FROM Person e");
        return (List<Person>) query.getResultList();
    }

    public void persist(Person person) {        
        em.merge(person); //1
    }

    public Person findById(Long id) {
        return em.find(Person.class,id); //2
    }
}
  1. The merge method persists the state of the object. If the object doesn't exist (if it has no id, or an object with the passed in id does not exist in the database) a row in the database will be created.
  2. The find methods allows to find a entity of a particular class, based on the id. This could also be achieved using an JPQL query.
In the person service class, we simply added two delegate methods to the DAO.
@Service
@Transactional
public class PersonService implements IPersonService{

    @Autowired
    private IPersonDAO personDAO;

    @Override
    public List<Person> findAll() {
        return personDAO.findAll();
    }

    @Override
    public Person findById(Long id) {
        return personDAO.findById(id); 
    }

    @Override
    public void persist(Person person) {
        personDAO.persist(person); 
    }
}
Now we look at the controller, in which we added several three methods that handle requests. One to display the UI to edit an existing record, one to display the UI to enter a new record, and one we we post the modified or new entry.
@Controller
public class TestController {

    @Autowired
    private IPersonService personService;

    @RequestMapping(value="/view",method = RequestMethod.GET)
    public ModelAndView view() {
        ModelAndView ret=new ModelAndView("view");
        List<Person> persons=personService.findAll();
        ret.addObject("persons",persons);
        return ret;
    }

    @RequestMapping(value="/view/{id}",method = RequestMethod.GET)  //1
    public ModelAndView viewById(@PathVariable Long id) { //2
        ModelAndView ret=new ModelAndView("person");
        Person person=personService.findById(id); //3
        ret.addObject("person",person);
        return ret;
    }

    @RequestMapping(value="/new",method = RequestMethod.GET)
    public ModelAndViewnewPerson(Person person) { //4
        ModelAndView ret=new ModelAndView("person");
        ret.addObject("person",person);
        return ret;
    }

    @RequestMapping(value="/post",method =  RequestMethod.POST)
    public ModelAndView post(Person person) { //5
        ModelAndView ret=new ModelAndView("view");
        personService.persist(person); //6
        List<Person> persons=personService.findAll();
        ret.addObject("persons",persons);
        return ret;

    }

}
  1. The first new method allows to view an edit a specific person, base on the person's id. A new notation is introduced here, to pass variables from the URL. In this case, variables surrounded by brackets (in this case {id}) are passed as variables annotated with @PathVariable. We also specify that this method will only be invoked for GET requests.
  2. By default, path variables are mapped based on name of the paramenter and the name in the url. A different name can be specified by changing the annotation @PathVariable("locationId").
  3. We utilize one of the new methods we created in the service classes to find the person given the id. We then pass that person to the model.
  4. The newPerson method declares a Person object in its signature. This is a model attribute. Since this attribute is not yet bound, and empty Person object will be passed. We pass this object to view.
  5. In the post method, we have a similar method signature with the Person object. In this case we do expect the object to be bound, since it's coming from a form which we'll see a bit later.
  6. We use the person service to persist the person object we received from the form, and then retrieve the list of all persons in the system.
To expose the new functionality, we have to make a few changes to the jsp we we using to display the persons:
<%@ taglib uri="http://java.sun.com/jsp/jstl/core" prefix="c" %> 
<html>
    <body>
        <table border="1">
            <tr>
                <th>First Name</th>
                <th>Last Name</th>
            </tr>


            <c:forEach items="${persons}" var="person">
                <tr>
                    <c:url var="personUrl" value="view/${person.id}.html"/>  <%-- 2 --%>
                    <td>
                        <a href="${personUrl}">
                            ${person.firstName}
                        </a>
                    </td>
                    <td>
                        <a href="${personUrl}">
                            ${person.lastName}
                        </a>
                    </td>
                </tr>
            </c:forEach>
        </table>
        <a href="new.html">Click here to add a new entry</a>  <%-- 3 --%>
    </body>
</html>
  1. We use the url tag to put together a url that includes the person id, and we store it in a variable named personUrl. Using the url tag is good practice since it takes into account the context of the application when creating urls. We then add the proper tags to link from each person.
  2. We add a simple link to a new page, that will enable us to create a new person record.
We also add a new jsp that allows us to edit and create new persons.
<%@ taglib uri="http://java.sun.com/jsp/jstl/core" prefix="c" %>
<%@ taglib uri="http://www.springframework.org/tags/form" prefix="form"%>  <%-- 1 --%>
<html>
    <body>

        <c:url var="postUrl" value="/post.html"/>  <%-- 2 --%>
        <form:form method="POST" commandName="person" action="${postUrl}">  <%-- 3 --%>
            <form:input path="firstName" />  <%-- 4 --%>
            <br/>
            <form:input path="lastName" />
            <br/>
            <form:input path="email" />
            <br/>
            <form:hidden path="id" />  <%-- 5 --%>
            <input type="submit" value="Submit">  <%-- 6 --%>
        </form:form>
    </body>
</html>
  1. We add another tag library, in this case the Spring form library which enables us to work with model attributes (in this case the Person object).
  2. We use the url tag to put together the url where we'll post our form.
  3. The "form:form" tag will render as a normal form html tag, but it takes a lot of the work of setting it up, if used within the scope of Spring MVC. Other than the standard "method" and "action" parameters, the tag takes a "commandName", which is the name of the model attribute that will be passed from the controller. It defaults to "command", but for this example we're specifying "person" to make it more readable.
  4. Tags such as "form:input" mimic standard HTML tags, but provide wiring to model attribute through the "path" attribute. In this case the field will be wired to the data of the field "fistName" in the person object.
  5. A hidden field ensures we send the id of the person object (in case we're editing an existing one). This will ensure we update the current record, and not create a new one.
  6. A plain submit HTML button is all that's needed to complete the form.
We can then compile and run our small application with:

mvn tomcat:run

You can open a browser and see the the application running at http://localhost:8080/spring-hib-jpa/view.html:

You can also add new people by clicking "Click here to add a new entry":
And how they are persisted:

Source Code

You can clone the code and play with it from github:
git clone https://github.com/aolarte/tutorials.git
The finished code is contained in directory spring2_forms. If you want to start with the base code, use the directory spring1_basics.

Simple Spring and JPA with Hibernate tutorial series:

Friday, September 27, 2013

Simple Spring and JPA with Hibernate tutorial. Part 1: The basics

This is a very basic Spring application, using MVC for the web interface and JPA for persistence. As the JPA implementation we will use Hibernate. However, it is fairly easy to switch to another JPA implementation such as EclipseLink (we will look at how to do this in a later post). In as much as possible, this example uses convention over configuration, favoring brevity over exhaustive listing of options.
This example requires Maven to be installed and functional. I'm using version 3.0.4, but any relatively new version should suffice.
We'll start taking a look at the pom.xml:

pom.xml

<project xmlns="http://maven.apache.org/POM/4.0.0" xmlns:xsi="http://www.w3.org/2001/XMLSchema-instance"
         xsi:schemaLocation="http://maven.apache.org/POM/4.0.0 http://maven.apache.org/maven-v4_0_0.xsd">
    <modelVersion>4.0.0</modelVersion>
    <groupId>test.tutorials</groupId>
    <artifactId>spring-hib-jpa</artifactId>
    <packaging>war</packaging>
    <version>1.0-SNAPSHOT</version>
    <name>spring-hib-jpa Maven Webapp</name>


    <properties>   <!-- 1 -->
        <springVersion>3.2.4.RELEASE</springVersion>
    </properties>

    <dependencies>

        <dependency>    <!-- 2 -->
            <groupId>org.springframework</groupId>
            <artifactId>spring-beans</artifactId>
            <version>${springVersion}</version>
        </dependency>

        <dependency>    <!-- 3 -->
            <groupId>org.springframework</groupId>
            <artifactId>spring-webmvc</artifactId>
            <version>${springVersion}</version>
        </dependency>

        <dependency>    <!-- 4 -->
            <groupId>org.springframework</groupId>
            <artifactId>spring-orm</artifactId>
            <version>${springVersion}</version>
        </dependency>

        <dependency>    <!-- 5 -->
            <groupId>org.hibernate</groupId>
            <artifactId>hibernate-entitymanager</artifactId>
            <version>4.1.9.Final</version>
        </dependency>

        <dependency>    <!-- 6 -->
            <groupId>jstl</groupId>
            <artifactId>jstl</artifactId>
            <version>1.2</version>
        </dependency>

        <dependency>    <!-- 7 -->
            <groupId>com.h2database</groupId>
            <artifactId>h2</artifactId>
            <version>1.3.161</version>
        </dependency>

        <dependency>    <!-- 8 -->
            <groupId>org.apache.tomcat</groupId>
            <artifactId>tomcat-dbcp</artifactId>
            <version>7.0.41</version>
        </dependency>

    </dependencies>
</project>
See below for detailed explanation of this file
  1. We define the Spring version as a property, since we'll reuse this property for several dependencies. You could do the same thing for the other libraries we're importing, but after a point, it becomes overkill. As of the writing of this tutorial, the latest stable Spring 3 is 3.2.4.RELEASE.
  2. The spring-beans package includes the basics to configure spring, and will be required in basically all spring applications.
  3. The spring-webmvc package provides front end functionality, which we'll use to create our UI.
  4. The spring-orm package provides the infrastructure to map Object Relational Mapping (ORM) tools into Spring. Nowadays most new work is done using JPA (Java Persistence Architecture) interfaces. This module provides the glue logic between the ORMimplementation and your application, exposing standard JPA interfaces, while still allowing to take advantage of specialized features provided by the ORM framework of your choosing.
  5. The hibernate-entitymanager provides the Hibernate implementation, to do our database work behind the scenes.
  6. The JSTL api will provide us with some standard tools to make writing our JSPs a bit easier.
  7. In this simple example will use an embedded database, H2. This database will run within the Java process, so we can do our work without the need to have an external database server. ORM implementations allow you to move between a small embedded database an a big "enterprise" level database without big changes to your code.
  8. A database connection pool improves performance by keeping a pool of open connections that clients can use. In most J2EE applications the database connection pool is managed by the application server (Tomcat, Weblogic, JBoss, Glassfish, etc... ). For this example we'll provide our own connection pool.
Now let's look at the web.xml:

src/main/webapp/WEB-INF/web.xml

<web-app xmlns="http://java.sun.com/xml/ns/javaee" version="2.5">

    <servlet>
      <servlet-name>spring</servlet-name>
      <servlet-class>org.springframework.web.servlet.DispatcherServlet</servlet-class>
      <load-on-startup>1</load-on-startup>
    </servlet>
   
    <servlet-mapping>
        <servlet-name>spring</servlet-name>
        <url-pattern>*.html</url-pattern>
    </servlet-mapping>

</web-app>
The web.xml is simple enough, with a single Servlet, provided by Spring, and a single mapping, which will send requests ending in html to the Spring MVC servlet. Loading of the DispatcherServlet will trigger Spring to look for a configuration file named spring-servlet.xml. This is based on the servlet name and the "-servlet.xml" postfix. There are other ways of configuring Spring, but for now the spring-servlet.xml file will suffice:

src/main/webapp/WEB-INF/spring-servlet.xml

<?xml version="1.0" encoding="UTF-8"?>
<beans xmlns="http://www.springframework.org/schema/beans"
       xmlns:xsi="http://www.w3.org/2001/XMLSchema-instance"
       xmlns:tx="http://www.springframework.org/schema/tx"
       xmlns:context="http://www.springframework.org/schema/context"
       xmlns:mvc="http://www.springframework.org/schema/mvc"
       xsi:schemaLocation="http://www.springframework.org/schema/beans
        http://www.springframework.org/schema/beans/spring-beans.xsd
        http://www.springframework.org/schema/context
        http://www.springframework.org/schema/context/spring-context.xsd
        http://www.springframework.org/schema/tx
        http://www.springframework.org/schema/tx/spring-tx.xsd
        http://www.springframework.org/schema/mvc
        http://www.springframework.org/schema/mvc/spring-mvc.xsd
        ">

    <context:component-scan base-package="test"/>  <!-- 1 -->
    <mvc:annotation-driven/>  <!-- 2 -->
    <tx:annotation-driven/>  <!-- 3 -->

    <bean id="viewResolver" class="org.springframework.web.servlet.view.InternalResourceViewResolver"> <!-- 4 -->
        <property name="prefix" value="/WEB-INF/jsp/"/>
        <property name="suffix" value=".jsp"/>
    </bean>

    <bean id="dataSource" class="org.apache.tomcat.dbcp.dbcp.BasicDataSource">  <!-- 5 -->
        <property name="driverClassName" value="org.h2.Driver"/>
        <property name="url" value="jdbc:h2:mem:test"/>
    </bean>


    <bean id="entityManagerFactory"
          class="org.springframework.orm.jpa.LocalContainerEntityManagerFactoryBean">  <!-- 6 -->
        <property name="dataSource" ref="dataSource"/>
        <property name="packagesToScan" value="test.model"/>
        <property name="jpaVendorAdapter">  <!-- 7 -->
            <bean class="org.springframework.orm.jpa.vendor.HibernateJpaVendorAdapter">
            </bean>
        </property>
        <property name="jpaProperties">  <!-- 8 -->
            <props>
                <prop key="hibernate.show_sql">true</prop>
                <prop key="hibernate.dialect">org.hibernate.dialect.H2Dialect</prop>
                <prop key="hibernate.hbm2ddl.auto">create-drop</prop>
            </props>
        </property>
    </bean>

    <bean id="transactionManager" class="org.springframework.orm.jpa.JpaTransactionManager"/>  <!-- 9 -->

</beans>
  1. Component scan from the context namespace will crawl through the source tree starting at package "test" and will wire all annotated objects. It will discover and wire any beans with the annotations @Controller, @Service, @Component, and @Repository. This will also enable configuration based annotation, which would normally be done with "<context:annotation-config/>".
  2. MVC is the user interface framework we'll use, and mvc:annotation-driven wires http actions from beans that have @RequestMapping annotations. In the MVC (Model View Controller) pattern, these beans are the Controllers.
  3. The tx namespace allows configuring Spring's transaction support. The element tx:annotation-driven instructs Spring to apply transaction functionality to beans that have @Transactional annotations. Spring will inject a transaction manager into the proper beans. By convention, a transaction manager name "transactionManager" will be injected, but can by configured explicitly by adding transaction-manager="nameOfMyTransactionManagerBean" to the tx:annotation-driven element. In this case we're defining trasactionManager further down the configuration file.
  4. The viewResolver allows Spring MVC to locate the JSPs that represent the View in the MVC pattern. In this case we'll keep the JSPs in the /WEB-INF/jsp/ directory, so that they cannot be hit directly, but accessed only through the controllers.
  5. In this example, we're providing the data source (instead of finding a data source provided by an application server). The properties passed must include at least the driver corresponding to the database to use, and a url. Since we are using an embedded database, nothing else is required, but most other databases will also require a username and password to be passed in as well.
  6. The entity manager factory provides access to the JPA implementation. In this case we're using the adapter that allows using Hibernate. The factory requires several attributes to be passed in. In particular a dataSource (in this case referencing the one created in point #5) and and package to scan for JPA entity classes. In this case we're scanning the test.model package for classes annotated with @Entity.
  7. The jpaVendorAdapter property takes a class implementing JpaVendorAdapter. In this case we provide the one appropriate for hibernate. Inside this property we further configure the adapter, however the syntax is more limited than what can be done passing properties directly as we do here in the next element.
  8. The jpaProperties allows to pass raw properties to the JPA implementation, bypassing the Spring ORM adapter. In this case we pass parameter so that Hibernate will show us the SQL it's executing, the type of database we'll be connecting to, and finally instruct hibernate to recreate the schema every time the EntityManager is started. In this case, the first two parameters could have been expressed inside the jpaVendorAdapter in a less verbose way. However, the last parameter cannot be expressed inside jpaVendorAdapter. The only parameter than can be expressed for "hibernate.hbm2ddl.auto" inside the jpaVendorAdapter is "update". By setting "hibernate.hbm2ddl.auto" to "create-drop" we get access to a hibernate specific functionality that allows us to execute a file (called "import.sql") after the database structure has been created. You can find more information here.
  9. The transaction manager we are using is appropriate to the JPA infrastructure we're using. By default this bean will be injected with an entity manager factory bean called "entityManagerFactory". This can be overridden by passing a property with name "entityManagerFactory".
Looking at the import.sql file mentioned before will give us an idea of how the database looks, but we'll into more detail how it looks when we examine the entity class:

src/main/resources/import.sql

INSERT INTO PERSON (firstName,lastName) VALUES ('Joe','Doe') ;
Now let's look at the actual code, starting with the Person entity class. An application will most likely have more than one entity class, but for this example we'll make do with only one. If you need more, just add them to one of the packages that will be scanned.

src/main/java/test/model/Person.java

@Entity //1
public class Person {

  @Id //2
  @GeneratedValue //3
  private Long id;
  private String firstName;
  private String lastName;
  private String email;

  // Getters and setters removed for brevity.
}
  1. The @Entity annotation specifies that the class is an entity. At the class level, other annotations can be applied, for example @Table, to specify a table. Otherwise defaults will apply. In this case the table name defaults to "Person" (the class name with the first letter capitalized.
  2. The @Id annotation specifies that this field is the primary key of the table.
A few notes when declaring entity classes:
  • By default, all fields are persisted, even if not annotated. If you want to exclude a filed, add the @Transient annotation.
  • You can specify the column name (among other properties) using the @Column annotation. If you omit this annotation, the default column name will be used (field name with capitalized first letter).
  • Annotations can be placed on the fields, or on the getters. Placing them on the getters will signal the JPA implementations to use JavaBean property access instead of field access. It is however recommended to not mix both in a single entity class.
Now we'll look at the DAO (Data Access Object). At this point it's fairly simple, and just implements a single method from an interface:

src/main/java/test/dao/impl/PersonDAO.java

@Repository   //1
public class PersonDAO  implements IPersonDAO {

    @PersistenceContext
    private EntityManager em; //2

    @Override
    public List<Person> findAll() {
        Query query = em.createQuery("SELECT e FROM Person e"); //3
        return (List<Person>) query.getResultList();
    }

}
  1. The @Repository annotation is a Spring stereotype, which is similar to @Component. The only extra functionality it provides is SQL exception translation.
  2. The EntityManager is injected thanks to the @PersistenceContext annotation. This is the interface that we use to interact with the JPA system.
  3. Our lonely method uses JPQL (Java Persistence Query Language) to query and return a list of all Persons. This is executed through the EntityManager.
The DAO is not called directly, but rather through service layer:

src/main/java/test/service/impl/PersonService.java

@Service //1
@Transactional //2
public class PersonService implements IPersonService{

    @Autowired //3
    private IPersonDAO personDAO;

    @Override
    public List<Person> findAll() {
        return personDAO.findAll(); //4
    }

}
  1. The @Service annotation is another Spring stereotype. However, @Service does not provide any additional functionality by default. You can later implement special handling based on this annotation.
  2. The @Transactional annotation specifies that method calls on this class. You can specify several parameters, but by default it will require transactions, reusing a current one or starting a new one. This is good enough for a lot of usages, but can be tweaked if needed.
  3. The DAO is injected with @Autowired. Where possible we use interfaces.
  4. The actual call to the DAO is fairly simple. However, it's worth noting that if we called more than one method in the DAO, both calls will be run inside the same transaction.
The web controller provides an "action" that users can invoke through their web browsers:

src/main/java/test/controllers/TestController.java

@Controller //1
public class TestController {

    @Autowired //2
    private IPersonService personService;

    @RequestMapping("/view") //3
    public ModelAndView view() {
        ModelAndView ret=new ModelAndView("view"); //4
        List<Person> persons=personService.findAll();
        ret.addObject("persons",persons); //5
        return ret;
    }
}
  1. The @Controller annotation is yet another specialization of @Controller, used to specify that the class is a web controller. However, this needs to go together with one or more @RequestMapping annotations to actually become accessible.
  2. The person service is autowired, just like we wired the DAO into the service in the previous file.
  3. The @RequestMapping defines what url this controller will respond to. In this case we're mapping to "/view.html". The html extension comes from the mapping in the web.xml. Further diferenciation can be done based on other elements of the request, such a method, agent, etc. This annotation can be applied to a method, or to a type AND method. If applied to a type, method level annotation are also required, and the paths declared on the method annotation will be appended to path defined in the type annotation.
  4. The ModelAndView is one of the many return types that @RequestMapping annotated methods can return, and is one of the most useful ones. It allows us to define the view, and well as the model (data) that will be rendered by the view. In this case the constructor takes a view name. This view name will be resolved to /WEB-INF/jsp/view.jsp by the InternalResourceViewResolver we defined in spring.xml.
  5. The last step is to populate the model data, in this case a list of all persons fetched by our person service. This list will be available in the view under the name "persons".
The last part is the view, which is a regular JSP (Java Server Pages):

src/main/webapp/WEB-INF/jsp/view.jsp

<%@ taglib uri="http://java.sun.com/jsp/jstl/core" prefix="c" %>  <%-- 1 --%>
<html>
    <body>
        <table border="1">
            <tr>
                <th>First Name</th>
                <th>Last Name</th>
            </tr>
        
        
            <c:forEach items="${persons}" var="person"> <%-- 2 --%>
                <tr>
                    <td>${person.firstName}</td>    <%-- 3 --%>
                    <td>${person.lastName}</td>
                </tr>
            </c:forEach>
        </table>
    </body>
</html>
  1. We declare the core tag library. This provides basic control functionality, and is part of the Java Server Pages Standard Tag Library.
  2. The core tag library allows an easy way to iterate over lists. In this case we iterate over the "persons" object we returned from the controller method inside the ModelAndView object.
  3. For each person we iterate over, we print the first and last name.
We can then compile and run our small application with:
mvn tomcat:run
You can see the product of our work at http://localhost:8080/spring-hib-jpa/view.html :
This is a very basic example, but we've explored all of the plumbing required to build a database backed web application. In future posts we'll build on top of this application, and add feature such as, data entry, security, webservices, etc.

Source Code

You can clone the code and play with it from github:

git clone https://github.com/aolarte/tutorials.git
The finished code is contained in directory spring1_basics.

Simple Spring and JPA with Hibernate tutorial series: